Monday, 10 February 2014

Best ever chicken and rice

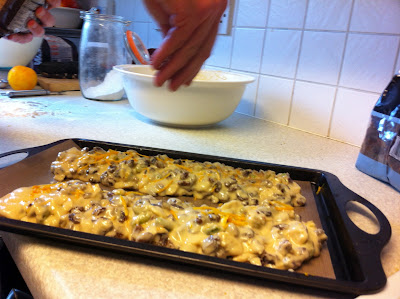
This is a draft, but just gotta get this down.... It's frikkin' awesome!  and 100% made up tonight in the Glass Oven...,

1 knob of butter (around 30g)
1 red onion roughly chopped
2 cloves garlic finely sliced
4 rashers smoked streaky bacon
1/4 teaspoon ground ginger
2 chicken breasts cubed
Pinch of salt & pepper
1 tsp sweet smoked paprika
1 red chilli finely sliced
1 green chilli finely sliced
About 120g basmati rice
3/4 pint chicken stock
1 red pepper sliced
1 tbsp runny honey
2 tbsp soy sauce
Zest of 1/2 a lime
Juice from half a lime
2 spring onions finely sliced

Preheat oven to 150c fan
In a shallow casserole dish :
Fry onion and garlic in butter until soft
Add bacon and fry off for a bit
Mix in ginger then brown the chicken in the mixture, seasoning with the salt and pepper and paprika
Once chicken is browned for about 8 min add chilli and continue to fry for another minute or so
Stir in the rice and get it nicely covered with the flavours from the pan
Pour In the stock and bring to the boil stir I the red pepper
Simmer with the lid on for about 10 mins, stirring once or twice
Stir in the honey, and soy sauce then bung in the oven for 10 mins
Remove from oven and let rest for 5 mins
Stir in lime zest & juice + the spring onions
Replace the lid and allow to continue to rest for 5 mins...

Eat that sticky chicken ricey mixture right up!

Tuesday, 31 December 2013

Quick French Baguettes


I know I've already done a recipe for baguettes using sourdough, but if you don't want to go through all of that malarkey - these ones are just as good (dare I say it, better!).

This post is a work in progress - just getting the basic recipe and method in, so that I don't forget it again!


Ingredients


  • 4 tsp fast action yeast
  • 2 tbsp. runny hunny
  • 500g strong white flour
  • 2tsp salt
  • 350-375ml tepid water
  • a bit of olive oil for greasing the bowl
  • Flour for dusting (or you can use cornflour or semolina for a bit of extra crunch)


Method

Dissolve the honey and yeast in 125ml of the water in a small bowl.

Cover and leave for 5 to 10mins until a nice yeasty foam has developed on the surface.

Mix the flour and salt in a large bowl and when ready, gradually mix in the yeast mixture until well combined.

Gradually add the rest of the water (about 225ml) mixing with your hands until a ball of dough is formed. 
If the mixture seems dry then add a little more water 1sp at a time - you'd be amazed at just how much a small amount makes a difference to your dough!.

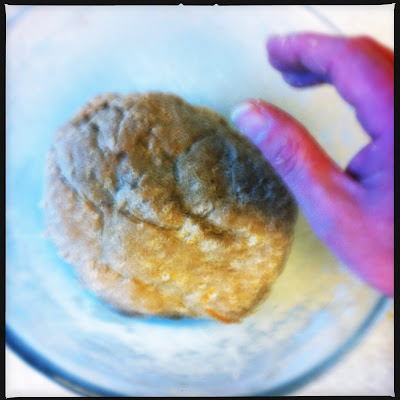
Once all of the flour has come away from the sides of your bowl and the dough can be formed into a nice ball, turn it out onto a lightly floured surface and knead for 2-6 minutes until the dough becomes smooth and elastic. 
To test for this, form the dough into a ball and if you press your knuckles into it it should spring back.

Lightly oil your mixing bowl with olive oil, put the ball of dough in and cover. 
Allow the dough to prove for at least 25-30 mins, until doubled in size. Depending on the ambient temperature it may take longer - personally I leave it for about 45 mins.

Punch all of the air out of the dough, then divide into two equal portions.

For each portion - using your knuckles, flatten out into rectangles roughly 15x30cm.
for each of the long sides fold the dough into the middle, and pinch to seal. You may want to fold the as in as well to make it nice and tidy.

Using a large lined / lightly oiled baking tray (or if your posh like me a baguette tray greased with a little olive oil) place the shaped baguettes seam side down.

With a sharp knife or razor blade, make 3-4 diagonal slashes on each baguette.

Lightly dust the baguettes with flour and cover with cling film or put them in a large proving bag.
Allow the baguettes to rise for about 25-30 mins until doubled in size.

Meanwhile, preheat your oven to 200c (fan - don't know what it is for the other types of oven, but it just needs to be hot) 

Place a deep roasting tray on the bottom shelf of the oven while it preheats and stick the kettle on to boil.

Once your baguettes have doubled in size put them in the oven (middle shelf), chuck a mug full of just boiled water in the roasting tray and bake for 15 mins or until golden brown.
(The water in the roasting tray makes steams which helps create that lovely chewy crust)

Leave to cool on a rack for at least 15-20 mins.
THIS IS IMPORTANT - The bread continues to cook at this stage and if you cut into it too early all of the steam trapped inside the crust will escape and whilst the bread won't be ruined, it just won't be quite right. Also - uncooked dough is very bad for the digestion and as these baguettes cook quite quickly, there is a chance of a 'doughy' interior unless you allow them to cool properly.


Notes / Tips :

You can use cold water for the second lot that you add (you need warmish for the yeast to activate in the first stage though) - this will increase the amount of time it takes for your dough to 'double' but the longer the prove the better the flavour. I tend to use 1/3 boiling to 2/3 cold for a temperature that get things going quickly though.

If your dough is really too sticky to work with, try to 'stick' with it without adding too much extra flour - just knead and slap your dough about for a bit longer until you get something that you can pick up off the work surface without it all staying stuck. 
You'll get a better bread a lovely crust and some of those nice authentic 'holes' in the bread as it rises in the oven. 
If this stresses you out though (and it does with me sometimes!), just dust with small amounts of flour until you get a dough that is easier to work with.


Saturday, 8 December 2012

Spiced Fruit Teacakes


So Christmas is coming and if you're anything like me there's a bunch of stuff sitting in the cupboard that was bought to make Stollen last year (that one might be coming up this year!).

So, to make sure adequate stock control is occurring in the bread and cake ingredients department I looked up this 'Mum Knows Best' Hairy Bikers recipe.

Stuck it all together this morning and we've now got some lush teatime treats...lush...

Ingredients (makes 12 large buns)

2 eggs and 1 orange - not the other way round, Mr. Glass
750g strong white bread flour
  • 1 tsp sea salt flakes, lightly crushed
  • 4tsp or 2 sachets fast-action dried yeast
  • 2 tsp ground mixed spice
  • 2 tsp ground cinnamon
  • 2 tsp freshly grated nutmeg (about 3/4 of a whole nutmeg)
  • 1 orange, zest only (yes, I know there's 2 in the photo)
  • 100g caster sugar
  • 100g unsalted butter, cubed
  • 300ml semi-skimmed milk (I've used skimmed - doesn't make a huge amount of difference)
  • 2 free-range eggs, beaten (yes I know there's only 1 in the picture - picky!)
  • 250g mixed dried fruit


Method


Mix the flour, salt, yeast, spices, orange zest and caster sugar in a large bowl. I normally muddle them together using a whisk.


Put the milk and butter in a small saucepan and warm gently - DO NOT BOIL.

Let the butter melt into the milk, stirring occasionally.  Once all the butter is melted, take the pan off the heat and allow to cool a little.  The mixture is ready when it's at 'blood' temperature - test it with the little finger of your left hand and if it feel neither hot or cold then it's just about right. 
              • Disclaimer : that's how I do it any way, if you choose to heat your milk and butter to a stupid temperature and then burn your little finger then you've only yourself to blame - use a thermometer if you're a bit of an idiot.


Show Off


Make a well in the dry mixture and pour the milk, butter and egg mixture.


Mix together with a wooden spoon until well incorporated and starting to form a nice ball of dough. You might want to finish this stage off with your hands...


Kneed the dough for about 5 minutes until smooth and elastic a good rule of thumb to know that it's about ready is to form it into a ball and give it a prod with your knuckles - if it springs back then you're just about there...


Flatten the ball of dough out and pour the mixed fruit over it.
Roll the dough up, a bit like a stomboli or swiss roll, then start kneeding again for about 4 minutes to mix and distribute the fruit as evenly as possible.


Be warned - bits of fruit will keep trying to escape - so be on your guard and slap them back into the dough if any of then get out of line - especially the bloody currants!
Escapee


Mass escape!


Grease your bowl with a little butter and stick the ball of dough in it. Cover the top of the bowl with greased cling film (or a shower cap - which is what I prefer to use) and set aside in a warmish place to rise for about 1 1/2 to 2 hours - or whenever it's doubled in size.


Meanwhile get your baking trays ready. 


Line them with greased baking parchment, or that special re-useable baking liner stuff - it's bloody brilliant and you don't need to grease it beforehand...


Once the dough is risen empty it out of the bowl and kneed lightly for a minute or so.

Divide out into 12 equal parts.  Roll each of them into balls, flatten them slightly with the heal of your hand. 

Sorry forgot to take photos of this bit -  I get a bit anal at this stage and actually weigh each ball of dough to make sure they're equal, but be as random as you like 

- honest it doesn't matter to me....          

 really...         no - don't worry about it....          

Well, OK do me a favour and just don't tell me you've been 'roughly' dividing up your dough OK? It might start off one of my 'episodes'...


Place the flattened dough balls on your prepared baking trays. and cover with greased clingfilm. Leave to rise in a warm place for about 45 minutes. Preheat the oven to 190c / fan 170c / gas mark 5.


Bake in the centre of the oven for about 18 mins turning / swapping the trays about half way through.


Cool on a baking tray for at least 1/2 an hour - they'll still be warm, so enjoy cut in half and spread with butter, or even better - cut in half and toast them the next day.


...mmmm.... nice....


Christmas Stollen coming up in the next couple of weeks - keep an eye out for updates...

Saturday, 8 September 2012

Yakitori Chicken


This simple recipe makes about 8-10 skewers of lush Chinese style marinaded chicken... - my take on Yakitori Chicken, but with stuff I had in the cupboard...


Ingredients

Meat & Stuff


  • 6 Chicken breasts diced
  • 2 red peppers cut into 1inchish squares
  • 1 large red onion cut into 8


Marinade


  • 175ml light soy sauce
  • 125ml sherry
  • 4 Tbsp Tomato Ketchup
  • 2 Tbsp cider vinegar
  • 4 cloves garlic crushed
  • 1tsp seasme oil
  • About 3 tbsp demerera, 
  • About 80 ml of orange or pineapple juice
  • 1 finely chopped red chilli 
  • 3 spring onions and a thumnail sized piece of ginger, both finely chopped... 


Method


  • If you've got wood skewers soak them for at least 1/2 an hour.

  • Mix all marinade stuff and bung in a medium sealable bag with the air all pushed out and put in a bowl in the fridge for 1.2 to 2 1/2 hours (can use a bowl covered with clingfilm at a push).

  • Agitate every 1/2 hour or so. Thread meat & veg onto skewers. Throw marinade away.


  • Cook on a screaming hot BBQ for at least 15 mins, turning frequently - I prefer about 25-30 mins...


  • Lush..


Scottie's Biscotti


People often ask me "Hey, what are you doing in my garden?"...

No, sorry, start again - people often ask me "Do people call you 'Scottie'?" 
and my usual reply is "Only once..."

For the sake of this recipe I'll make an exception 'cos it kinda works...

Picture the scene if you will....
It's mid morning - you're sitting by Lake Como in an Italian cafe sipping your Espresso* and feeling generally relaxed and at one with all things.  A sailing boat drifts lazily by using the gentle breeze as it's only method of getting from 'Here' to 'There'.  A fisherman is pulling in his net singing 'O-solo-mio' and you can't help but get an urge for a Cornetto, which aren't as big as they used to be and they were only 50p (or am I think of a 'King-Cone').  

Instead of a Cornettos (or King-Cones) the waiter brings you a very hard sweet biscuit which is surprisingly nice dunked in your coffee...  You ruminate on simpler times, when you could just take in the world as it went by... no email... no mobile phones... no download limits and no irritating calls about PPI...  

You drain your espresso, retch slightly because of the crumbs of biscotti you find at the bottom of the cup and commence a slow meandering walk along the shores of this picturesque and unspoilt vista that has seen more history than Nicolas Parsons.  

You wake in the middle of the night, with the sudden realisation that you didn't pay the bill in the cafe -" Oh well never mind", you think to yourself, "I'll pop back tomorrow and tell the manager that his staff need better training.."

A smile makes it's way across your lips as you slip back into your slumber, with images of irate Italian waiters being fired, drifting playfully through your head.

Anyway, here's my recipe for Biscotti - eat it in your kitchen when it's raining and it'll make you feel a bit better. Pics courtesy of Mikey - Thanks Son, although I did have to rotate all of them 180 degrees before uploading any of them.

I'm sure I've got a pic of Lake Como somewhere (or perhaps it's Perry Como..., I'm not sure...)


Ingredients


  • 250g plain flour
  • 250g caster sugar
  • 1 1/2 tsp baking powder
  • 2 large or 3 small eggs lightly beaten
  • 100g shelled pistachio nuts
  • 150g sultanas (or if you're really posh quartered glace cherries!)
  • Zest of one lemon
  • 2 tsp granulated sugar
  • A handful of almond flakes to decorate

Method

  • Preheat your oven to 160c /140c Fan...er... gas mark B(?)


  • Line a baking tray with baking parchment and grease with a little butter (that's the only real fat in this recipe!)


  • Sift the flour, caster sugar and baking powder into a large bowl then stir to combine.


  • With a wooden spoon, beat in about 1/2 the eggs until well combined.
  • Add the rest of the eggs a bit at a time until you get a dough-like consistency. Note - you probably won't need all of the egg and just add a bit at a time - it's easy to end up adding too much egg and end up with a cake sponge consistency. If this does happen add 20g of flour and 20g caster sugar then mix - add more in 20g quantities until you get it back to a dough-like consistency)


  • Stir in the nuts, sultanas and lemon zest until well incorporated (yes I know it's not a lemon in the photo, but actually any citrus will probably do the job...)


  • Divide the mixture into two, make them into two 25cm long 'sausages' and place on the baking tray - flatten them slightly.

  • Sprinkle on the granulated sugar, then the flaked almonds.


  • Bake in the the oven for 15-20 mins until golden brown. Tip: better to over bake slightly rather than underbake and have them all soggy - it makes the next stage a lot easier.


Yes I know it's underbaked...
  • Remove from the oven and allow to rest for about 10 mins.


  • Turn out onto a chopping board, and using a bread knife cut diagonally through each 'cake' to form 3cm wide biscuits.


  • Place the biscuits back on the tray on their sides them pop back in the oven for 6-10 mins.
  • Remove from the oven then turn the biscuits onto the other side and bake again for 6-10 mins.
  • When baked, allow to cool on a rack.  Tip - if they are still a bit 'soggy' as mine often are because I almost always add too much egg!) pleace the cooling rack with the biscuits in the oven as it cools - it should dry them out a bit.


  • Serve with Lavazza espresso* coffee, or with vanilla icecream as a dessert...
Because of the dryness of these biscuits, they will keep in an airtight container for about a week, however I've never had them long enough to check this for certain.

Recipe adpated from James Martin's version on BBC Good Food, although you will notice that I have never once used the word 'poncy'.


 *that's espresso by the way - not bloody expresso!!! - get it right or I'll hunt you down and leave a damp spoon in your sugar...